Learn innovative methods to take screenshot on Chromebook or Google Chrome browsers quickly. Explore efficient techniques for capturing various screen images.
There are many different methods to take screenshot on Chromebook or Google Chrome browsers, but here we feature some innovative and fastest ways to capturea a variety of screenshots. Typically, computer screenshots are taken via Windows’ snipping tool and the Print Screen button. However, there are several tricks you may use to practice this if you frequently want to snap screenshots in a web browser.
The Chrome tool’s primary distinction from the Print Screen tool is that it only captures the content of the web page, not the Chrome browser window’s borders.
In Google Chrome, you can capture a screenshot using the developer menu or one of the tools that come with your machine. When using Chrome’s developer menu, enter the Element Inspector and then type “screenshot” to take a screenshot.
Even if the entire web page doesn’t fit on your screen, you can choose from four screenshot types, including one that does. You presumably already know how to take screenshots on your computer, including with Windows 10’s Snipping Tool and the Print Screen button.
However, if you frequently need to take screenshots and use Google Chrome as your online browser, you might want to use the browser’s in-built, albeit, screenshot feature. Because it’s considered a tool for coders, not many people are aware of it, even though anyone can use it.
1. Take a Screenshot on Chromebook /Google Chrome using Developer Tools
Utilizing some built-in developer tools will allow you to take screenshots of more precise components in Google Chrome.
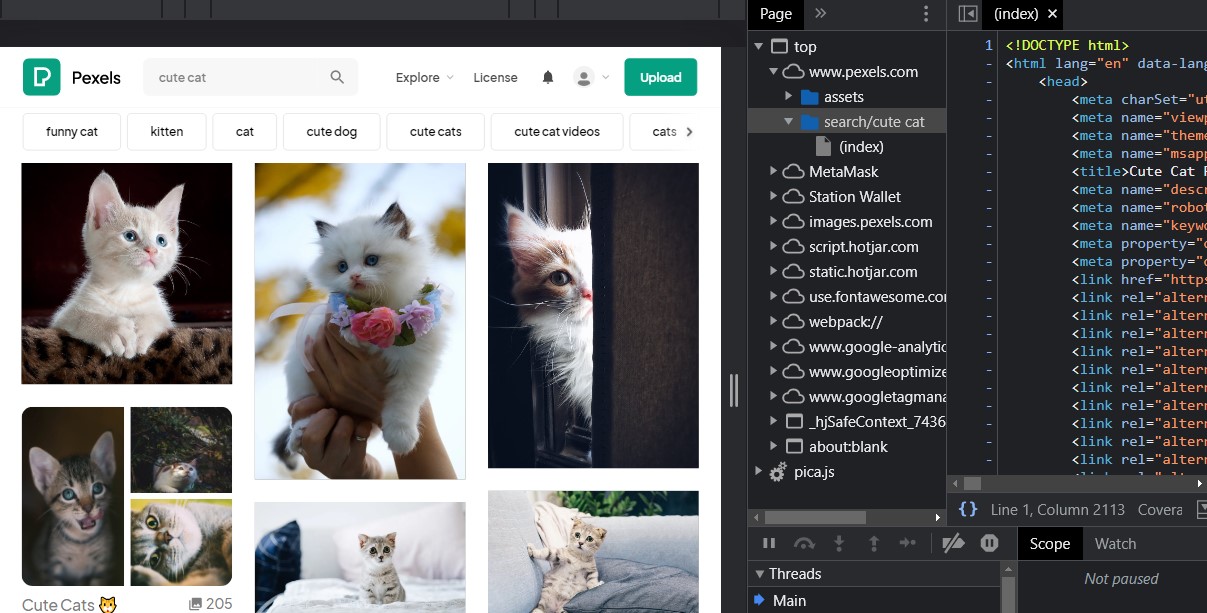
1. Open Google Chrome and press the letter I, not the letter L, by pressing Ctrl + Shift + I on a PC or Command + Option + I on a Mac. By doing so, the Element Inspector developer menu will open, allowing you to view the HTML code used to create the currently viewed web page.
2. Next, on a PC or Mac, click Ctrl + Shift P or Command + Shift P. You may now search your list of developer tools using this.
3. Keyboard “screenshot.” Do not hit Enter. A selection of four screenshot alternatives ought to appear.
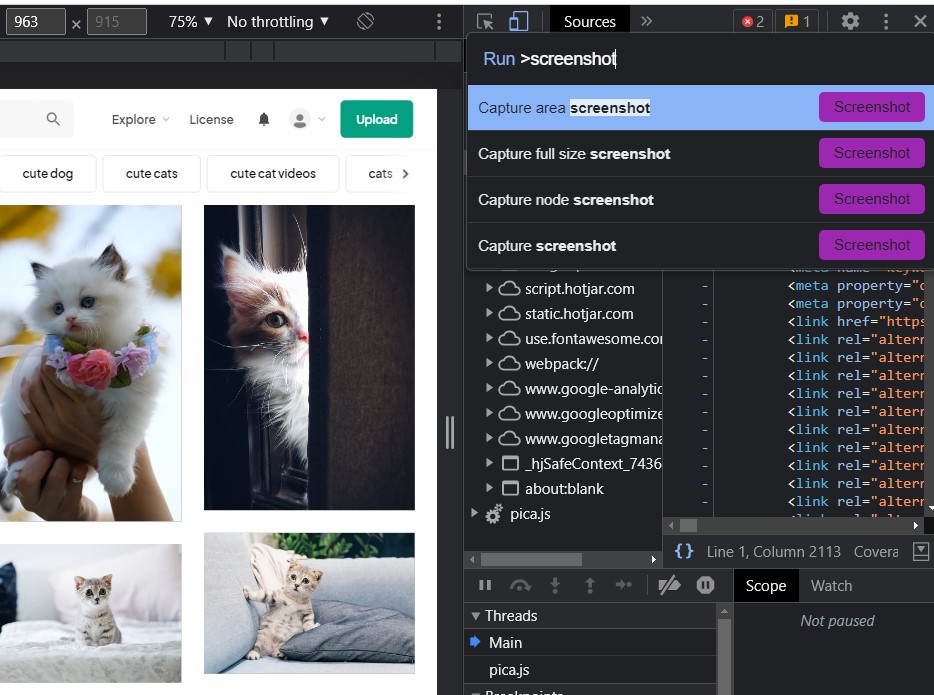
The four screenshot choices each accomplish the following:
1. Picture of the desired area.

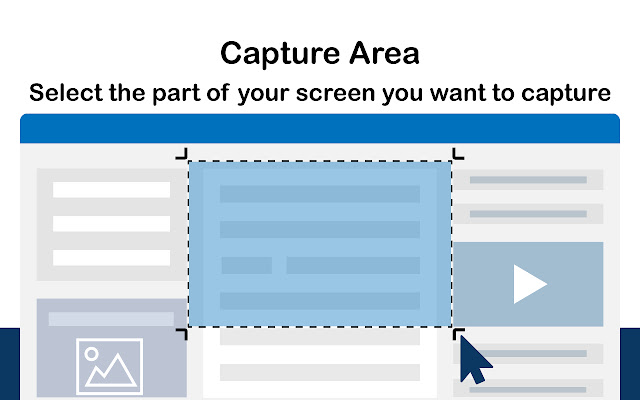
This enables you to choose a specific area of the screen and take a screenshot of it. After a little delay, if you select this option, you will be able to drag a box with the mouse anywhere inside the Chrome window. Choose the section of the page you want to preserve, and it will be selected. The Element Inspector itself cannot be screenshotted with this tool because it is never included in the screenshot.
2. Take a full chrome browser screenshot for any webpage

With this option, a full-page image of the website is saved. It’s an easy technique to capture a picture of a long page that goes well past the bottom of the screen.
3. Take a screenshot of the node
4. Take a screenshot.
Scroll down to the one you want using the arrow keys on your keyboard, then click Enter. You will receive a screenshot that will be instantly saved. It is located in the download manager for Chrome at the bottom of the window.
The Chrome screenshot tool includes the web page’s content, as opposed to the Print Screen option, which also consists of the borders of the Chrome browser window.
The screenshot should automatically save to your computer when you select the right option. If so, a download icon will appear at the bottom of your browser window. Like any other download, you can access it by double-clicking the file in your downloads folder or by clicking the file at the bottom of the Chrome browser. Additionally, you can trim it using an editor just like any other image.
Follow these steps on a Mac, PC, or Chromebook to snap a screenshot in Google Chrome.
- Taking a screenshot on a Mac is the same as on a PC. However, due to the variances in Apple’s keyboards, there are a few differences in the shortcuts.
- To capture a snapshot of your entire screen, use Command + Shift + 3.
- Use the keyboard shortcuts Command + Shift + 4 to transform your cursor into a crosshair. To screenshot a specific screen region, click and drag the crosshair over it. Press and hold the Space bar while dragging your click to move your selection. To complete the screenshot, click and then release the button. To stop taking your screenshot, press Esc.
- The keyboard shortcuts Shift + Command + 4 + Space will turn your cursor into a camera. To take a window screenshot, click the camera icon next to it.
- The default screenshot destination is your desktop, but you can alter it.
2. How to Take Screenshot in Google Chromebook or Browser using an Extension
Utilizing an extension is the final simple approach to snap screenshots on Google Chrome. Look for the extension Awesome Screenshot & Screen Recorder in the Chrome Web Store. Click Chrome Add.
For convenient access, apply the extension to your browser’s toolbar. You can use Awesome Screenshot whenever you wish to snap a screenshot after pinning the extension.
At the extension’s top, select the Capture tab. If you are logged into your Google account, only choose Cloud under save image to at the bottom. If you are not, choose Local.
What kind of screenshot do you want to take?
- Visible Section Full Page
- Specified Region
- After a delay, the entire screen and app window are visible.
- Local & Clipboard Image Annotation
You may Also Like to Read: Auto-refresh Extensions for Google Chrome
3. The Best Chromebook Extensions For Taking Screenshots
A piece of software you add to your browser to personalize it is known as a browser extension. The most widely used browser, Chrome, and its OS on Chromebook offer many extensions. Numerous of these add-ons are just for Chrome screenshots.
Here are five widely used snapshot extensions and their ideal applications:
a. Full Page Screen Capture
This one has more than 4 million users and almost a five-star rating for a reason. One benefit is that it’s free. Additionally, it’s a simple-to-use addon that enables you to quickly and easily capture the entire webpage you’re on.
The extension will capture the website as it scrolls from top to bottom when you click on its icon at the top of your browser window. The programs can handle complex pages with embedded frames and inner scrollable elements.
After the extension has finished scrolling, a new tab will open with options for saving your screenshot in JPEG, PNG, or PDF formats. You can also change the PDF page size if you desire. Full-page screen capture is also suitable to take a screenshot on Chromebook
b. Awesome Screenshot
This highly rated extension is free and offers a wide range of practical features, such as:
- Capturing all or just a portion of a webpage
- Assistance for PNG pictures
- Adding annotations or comments to your screenshots
- Becoming hazy
- Any private information you want to conceal should be blurred out.
- capturing your computer screen in MP4 video and narrating it
You may immediately send your finished snapshot or record to several project management applications like Jira or Trello. Additionally, you can store your screenshot in the cloud on a Google drive.
Also Read: Best Security Extensions for Google Chrome
c. Nimbus Screenshot & Screen Video Recorder
This is a powerful browser extension that comes with a variety of advanced functions, and the basic edition is free.
Among its primary free features are:
- Capturing all or a portion of a web page
- Selecting a portion of the page, then scrolling down to capture more of it, is known as “select and scroll” capturing.
- Delayed snapshot capture
- Capturing a mobile-friendly layout of a screen by including a watermark
- Capturing video of your computer screen, be it a browser tab or your entire desktop
There is a premium edition available for $24.99 annually that adds a few additional helpful features, such as:
- GIF creation for your screen capture
- watermarking your screenshots
- Customize video by editing and cropping
- uploading files to Dropbox or Google Drive
- YouTube screencast uploading
- It also functions without an internet connection and is offline.
d. Fireshot
There is an improved version of this plugin that is partially free but costs money.
You can capture the entire webpage or just the viewable portion of it, exactly like with most of these other add-ons. Alternatively, you can choose a section of the website to record using your pointer. Your snapshot can be saved as a JPEG, PDF, PNG, GIF, or BMP file. The files can be emailed or saved to your PC.
The primary selling point of Fireshot is its integrated image editor. You can quickly and easily crop, modify, or annotate screenshots in the editor.
The free edition of Fireshot is the basic version; the pro version, which includes all the upgrades, costs $39.95. The premium edition gives you access to the picture editor and lets you post screenshots to websites like Flickr, OneNote, Picasa, and social networking.
e. Lightshot
This quick and straightforward plugin is comparable to Fireshot because it has integrated picture editing features. Lightshot is completely free, in contrast to Fireshot.
Any area of the website can be chosen to take a screenshot of, save, or share rapidly.
A fascinating extra feature is an ability to search the web, your hard drive, or comparable screenshots. If you work with screenshots frequently, this is extremely useful.
We hope you found our guide helpful for take screenshot on Chromebook! Master these techniques to capture your screen effortlessly and enhance your productivity. Happy screenshotting!