The webcam on almost all the newest Chromebooks allows you to capture images. Some are fairly decent, but if you frequently use your Chromebook for video conferencing, you might need an extra webcam.
The Chromebook’s camera will work fine for most casual users to take a quick snapshot. The following advice will help you take stunning images with your Chromebook camera.
The many pre-installed apps and utilities might be difficult to identify and use if you’re new to Chromebooks. But once you know how to use the camera, capturing pictures should be very easy.

Recently, Google released Chrome OS 76 stable, which included several new features including Virtual Desks and a redesigned Camera app.
Google relocated the shutter button and camera mode, introduced a landscape mode and made some critical shutter speed adjustments.
For the sake of this tutorial, we’ll assume that you have a Chrome book with a camera, one that is linked to your Google Drive account, and one that is attached to a printer.
Take a Photo on a Chromebook
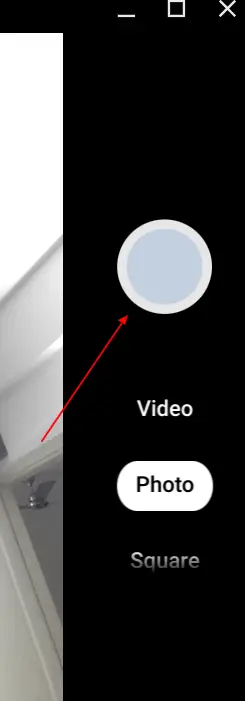
Launch the Camera app on your Chromebook, compose your composition, and then hit the Shutter symbol to take a picture. Select the Timer icon if you need to first set a timer. A 3- or 10-second delay is available.
Select the Video icon next to the Shutter icon to create a video. The recording can then be started and stopped by pressing the Start recording button.
You may also like: How to Save Battery on Chromebook
What to Do After Taking a Photo on Chromebook?
Selecting the thumbnail of your most recent photograph or video in the lower right corner will allow you to view all the photos you’ve recorded after they’ve been captured.
Here are some options:
Print your image (the icon is shaped like a printer).
Save the picture (the icon is shaped like a downward-pointing arrow in a box).
Delete the picture (the icon is shaped like a trash can).
Go back to the camera app (the icon is shaped like a left-pointing arrow).
Launch the Camera app on your Chromebook first.
It may be accessed via the launcher menu.
Search for “Camera” by tapping the keyboard’s “Search” button.

Or, choose “All Apps” and search for the camera icon there.
To take a picture after the app has opened, click the shutter button on the right side.
The picture is shot in landscape mode.
But, if you select “Square” before pressing the shutter, your images will have equal portrait and landscape proportions and a square form.
A thumbnail of the most recent image will show in the bottom-right area as soon as you press the shutter button.
You may also like: Best Games to Play on Chromebook (2023)
To take more pictures, press the shutter button. When shooting photos on your Chromebook, three more icons on the window’s left side might help you even more.
To do any of the following, click on any of these:
Mirror the image by rotating the right-to-left axis of the camera.
Use Gridlines: Before you take the photo, add a grid to assist you in straightening it up.
Timer: Use a delayed timer to take pictures. You will see a fourth icon to choose between the active cameras if your Chromebook has more than one camera or if you connected a second one through USB.
Selecting the gear icon may adjust the camera grid’s size and timer duration. You’ll access the Settings menu after doing this.
Saving a Picture on Your Chromebook
This is where some people could become a little confused. Keep in mind that the Chromebook makes the best cloud platform. You would believe images or screenshots you take on Chromebook are stored in your cloud account because it is linked to your Google account.
That is not the standard scenario. In the local Downloads folder, photos captured with the Chromebook camera are saved when you save them. But you may specify where the image is saved during the procedure.
How do I view photos on Chromebook?
- Open a picture in the photo editor.
- Go to your Chromebook and log in.
- On the Launcher, click.
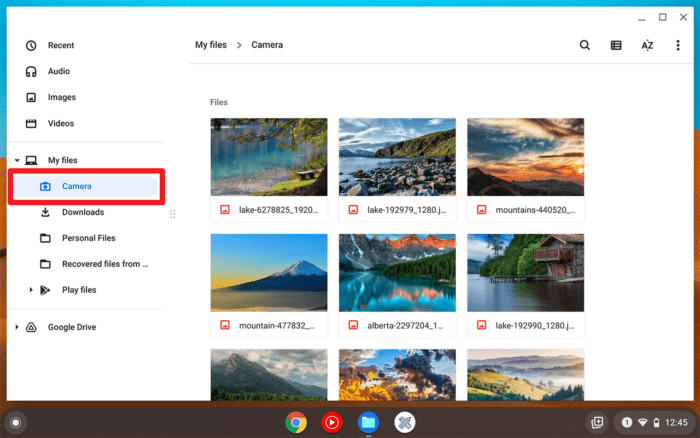
- Select Files.
- Locate the picture you wish to view. It could be kept in “Downloads” or “My Drive.”
- Click the image twice.
View all your captured Images and Videos
Choose the thumbnail of your most recent image or video in the bottom right corner of the camera. Double-click the image or video to view it bigger.
How to See and Save Your Photos
View All your Pictures
- Launch the camera application, then select Gallery.
- View the gallery
How to View your Images larger
- Double-click a picture after opening the Gallery.
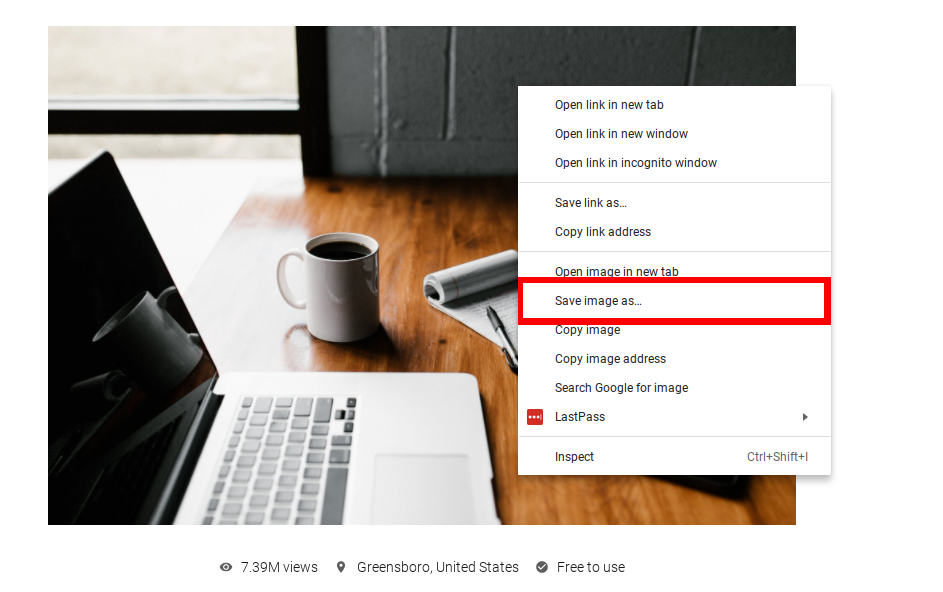
- Save picture: Select a folder and then click Open after clicking Save Picture to Disk.
- The image will be saved to the directory you specified.
To save a photo directly to Google Drive:
Open up the Google Drive entry.
Choose My Drive.
Locate the folder where you wish to store the image.
Choosing the Open button.
How to Print a Photo from Your Chromebook
It’s simple to print photos on a Chromebook. Your Chromebook has to be linked to a printer, as was indicated before. Once that’s done, click the Print icon next to the photo you want to print in the Camera Gallery.
Pick the Change button in the next window. A list of the accessible printers is provided to you. Then click Print after choosing your printer.
How to Locate Your Photos
To view, edit, and share your photos with your loved ones after you’ve finished taking them, locate them on your Chromebook.
You may carry out this action from the Camera or Files apps.
How do I download pictures from my Android phone to my Chromebook?
Unlock the screen by connecting your Android tablet or smartphone through USB to your Chromebook. If Google+ Photos is installed on your Chrome device, the Chrome file manager should launch, allowing you to browse, view, and transfer files.
How do you crop a picture on a Chrome book?
You may crop the image or let Chrome OS adjust it. Additionally, you may alter the image’s brightness, contrast, and orientation. The Chrome OS picture editor is limited to that.
Next Suggested Read: How to Unzip Files on Chromebook