If your Photoshop brush size not showing on your PC, especially if your brush starts to display a crosshair rather than a circle with an outline or if nothing happens when you begin painting, it is unclear what to do.
When you don’t want to rely on the less precise normal circle cursor, you can utilize the crosshair to paint with pixel-perfect accuracy. However, it’s not immediately clear how to make it display a circular Brush size preview once more.
How to Fix Photoshop Brush Size Not Showing
You can get the Brush Tool to show the brush size circle by pressing the Caps Lock key. Depending on the situation, this switches between Photoshop’s crosshair cursor, which is more accurate, and the normal Brush cursor, which is less accurate and shows your brush size as you paint.
Why Photoshop isn’t functioning with your brush?
If your brush still doesn’t function, try using it in a different software first, such as Paint or Notepad, and then in Photoshop. You can also disconnect and reconnect your pen-tablet.
Various alternatives to fixing a broken brush in Photoshop include:
1. Select the Caps Lock button.
The crosshair cursor has a use if you are using a very fine brush tip, even though the regular Eraser cursor is excellent for daily work.
As there is no outline, you cannot see the size of your brush as you paint, but the crosshair points to the exact centre of your brush, allowing for far finer control of your brush.
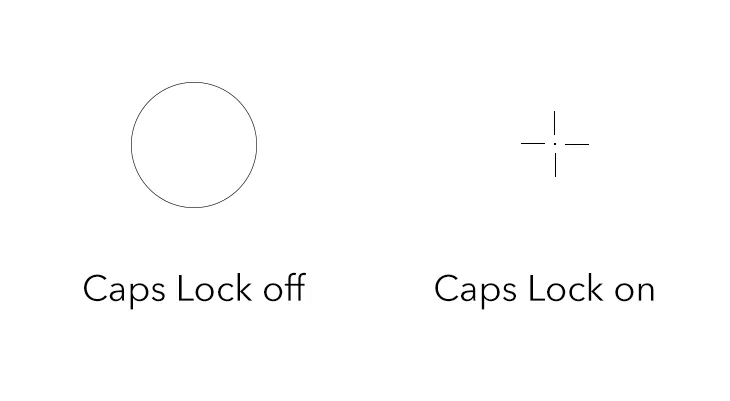
Simply hit the Caps Lock key to change the cursor from a crosshair to your usual circular Brush cursor, activating the size preview, if the Photoshop Brush circle is not working.
2. Disable Dual Brush
When Dual Brush is turned on, it frequently results in the Brush circle not appearing.
With your Brush Tool chosen, press F5 to bring up the Brush Settings menu or choose Window -> Brush Settings from the menu to turn this off.
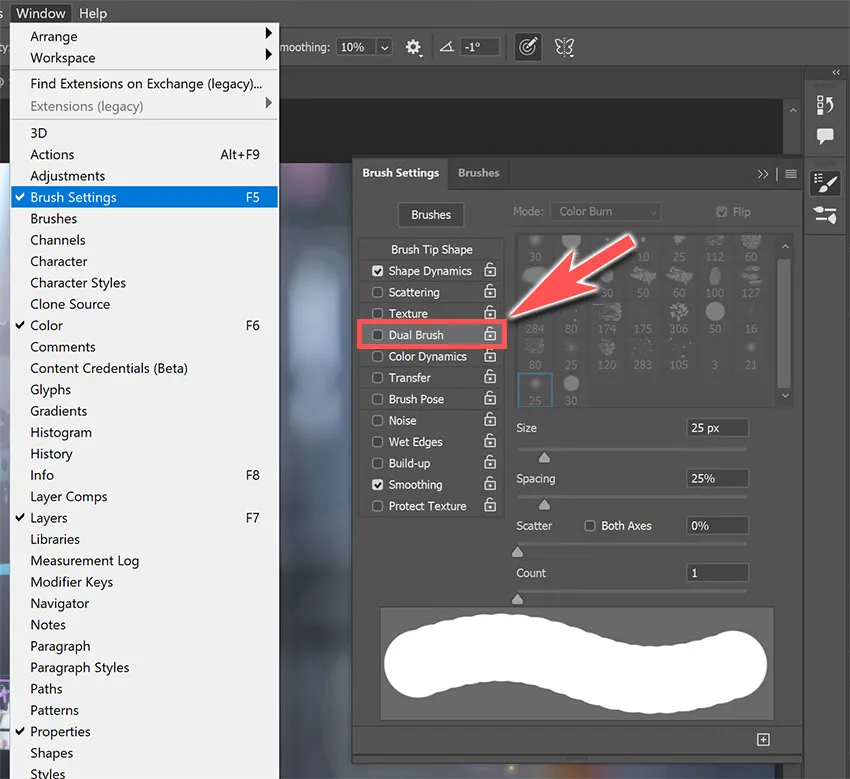
Uncheck the box next to Dual Brush after that.
3. Select a full-sized brush tip.
Changing your brush tip to Full Size will solve any problems with your Brush size preview.
Open the menu and select Preferences -> Cursors.
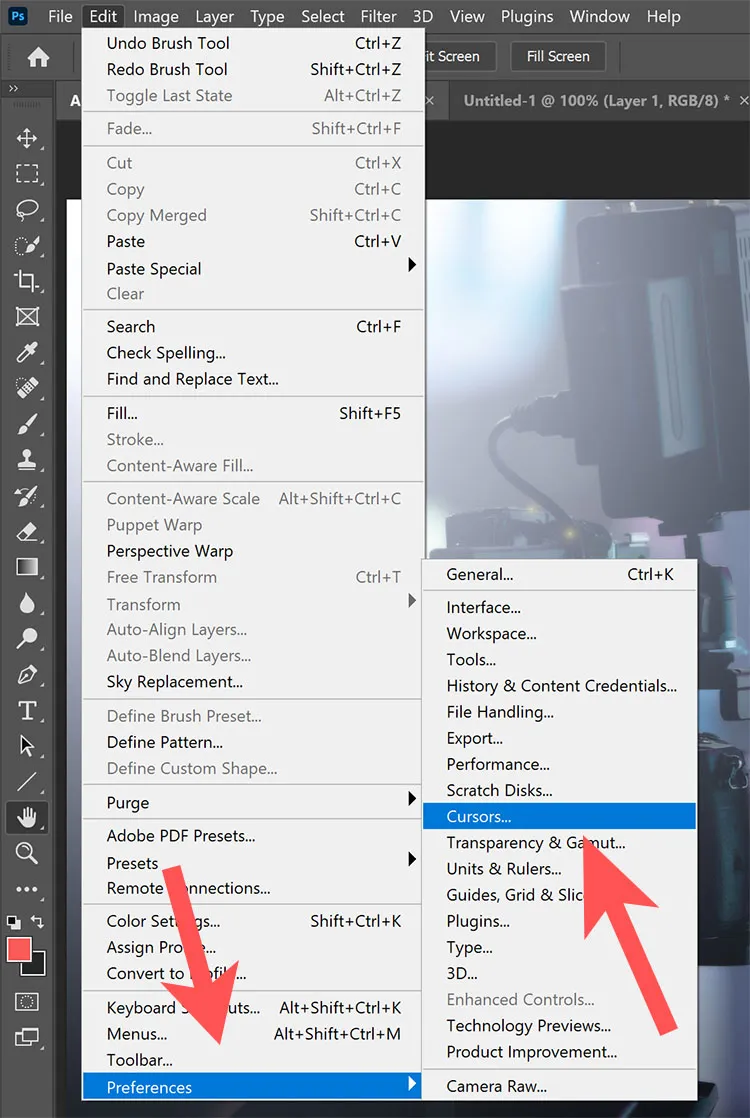
Choose the Full Size Brush Tip option under Painting Cursors.
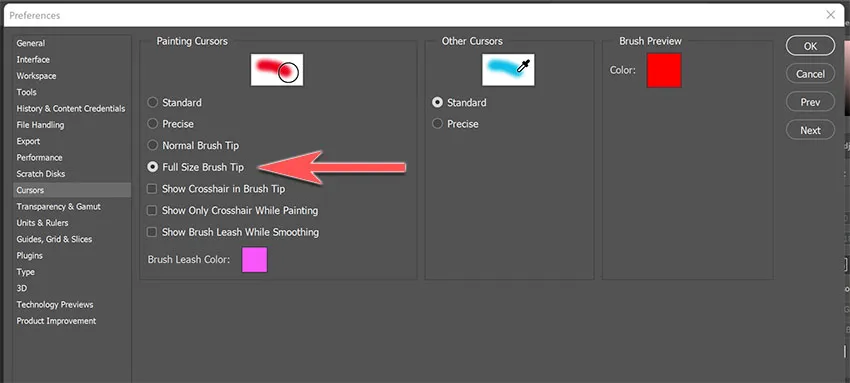
This should make it possible for the Brush to provide a size preview.
You may also like: Photoshop Crop Tool Not Working Fix
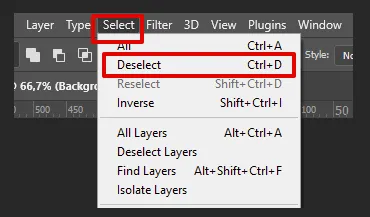
4. Reverse All Selections
It’s possible that you accidently picked a portion of the image with a selection tool, such as Patch or Lasso, or that you neglected to deselect it after using one.
Alternatively, you won’t see the Select Border if you simply chose a single pixel or other small area.
The Brush Tool can only be used on the regions that are covered by a selection.
Press Ctrl/Cmd+D or choose Select -> Deselect to make sure you don’t have a selection active.
5. Deactivate the pen pressure controls.
The Brush Tool may not work properly if you use a tablet. Occasionally, even if you don’t use a tablet, this could occur.
Therefore, to correct this, you must first check the tablet’s settings and attempt to correct it from there. Alternatively, you can change the pen pressure directly in Photoshop.
Try detaching and reconnecting the tablet pen to see if it helps, and then make sure you have the most recent drivers updated. Visit the links to check your Wacom, XP-Pen, Huion, and Gaomon drivers.
The steps below can be used to disable pen pressure controls in Photoshop:
- In the Options Bar select the Brush Settings Panel.
2. The Brush Settings Panel will appear, displaying a number of different brush settings. You must locate any setting that permits the usage of pen pressure and disable it.
3. The last area you had open will automatically be selected when you first access the Brush Settings panel. Jitter Controls can be found in the Transfer section, so start there (Opacity, Flow, Wetness, and Mix). The majority of them ought to be disabled. However, for each one that is not, set the control to OFF in the Drop-Down Menu.
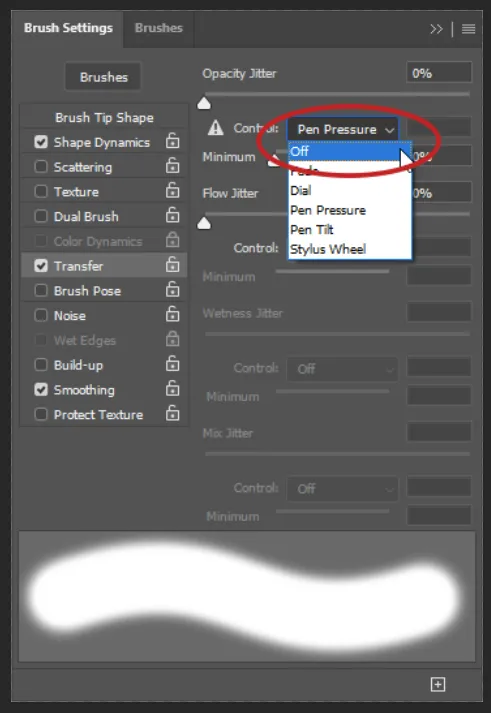
4. The same procedure must be followed for Shape Dynamics, Scattering, and Texture.

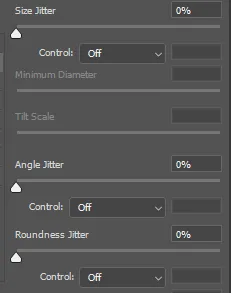
5. The Size, Angle, and Roundness Jitter Controls are located in the Shape Dynamic section. Turn them all off. If any of them are greyed out, don’t worry. Disregard them.
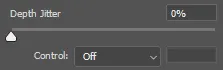
6. Repeat the procedure for the Texture section’s Depth Jitter Control. It ought to be turned off as well.
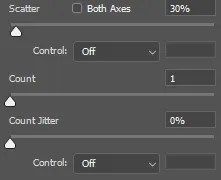
7. Switch OFF the Scatter and Count Jitter settings in the Scattering section.
6. Check the Flow and Opacity of Your Brushes
Maybe the transparency or flow setting on the brush you’re using was lower?
You might believe that your brush is defective if the Flow and Opacity aren’t both set at 100%.
You can smooth the brush and lessen its opacity by adjusting the flow and opacity. Make sure the opacity and flow parameters are 100% if you want the Brush Tool to work semi-transparently.
The options bar at the top of the screen contains the opacity and flow fields.
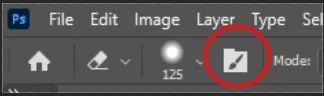
7.Restart the Brush Tool
The last resort is to attempt to reset the tool if you are still having trouble getting the Brush Tool to display a circle.
This should not be done lightly because it will erase all of your choices and presents from the Clone Stamp, but if all else fails, it should at least get it back to working.
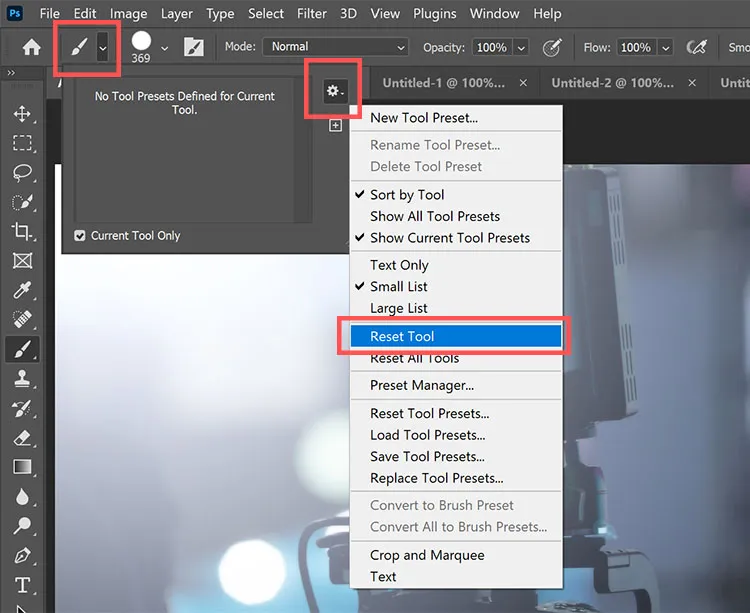
- Make sure the Brush Tool is first selected by either choosing it from the toolbar or by using the “B” key.
- From there, select the dropdown menu next to the Brush symbol in the Options Bar (it’s adjacent to the Home icon) to access the Brush Tool Settings.
- When you click on the Brush Icon, an Option Menu will appear.
- Then, pick the Reset Tool option from the options menu that appears after selecting the Cog Gear.
5. This completely resets the Brush Tool to its factory settings from when Photoshop was originally installed.
6. Ideally, this has resolved your problem, but if not, there is still something you can do.
8.The files for Photoshop preferences may be damaged.
If none of these solutions work to resolve your problem, you may have a corrupt preferences file. All of your preferences and settings are saved in the preferences file, so wiping that file clean will restore all of your Photoshop settings to their default positions. It will resemble a brand-new Photoshop installation in several ways.
Method 1. Using Shift+Ctrl/Cmd+Alt
- Save all of your work, then shut down Photoshop.
- Allow a few seconds for all of the background processes connected to it to finish.
- Then, while holding Shift+Ctrl+Alt on a Windows computer or Shift+Cmd+Opt on a Mac, start Photoshop.
- A dialogue window that asks if you wish to delete the Adobe Photoshop Settings File appears before Photoshop even starts up.
- If you decide to proceed, Photoshop will run with the Preference File reset and all settings will be restored to their default values.


